Posts

Stampin' Up! Happy Forest DSP Good Luck Card
Image
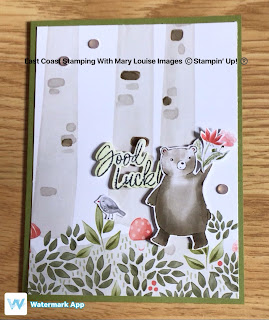
 Good day everyone!  Today's post was based on a sketch that I found on another's demonstrators blog.  You know me and sketchs, we go together like peanut butter and jam.  Haha! This was another fun one where I used mostly Designer Series Paper to create a great card.  Using a fun piece from the Happy Forest DSP layered onto an Old Olive cardbase starts the card off in the right direction.  Then fussy cut a few images from the same paper pack-I did the bear, bird and a few flowers which are adhered to the card front.  The sentiment is from the Charming Sentiments bundle which was stamped using Memento ink onto Basic White cardstock.  Some Old Olive ink and my Blending Brush added some colour to the die cut which was then popped up using Stampin' Dimensionals.  Some Elegant Faceted Gems were added to the project to finish everything off. Materials and measurements: Old Olive cardstock 5 1/2 x 8 1/2 Basic White 4 x 5 1/4 Happy Forest DSP 4 x 5 ...

Stampin' UP! Sun Prints DSP Birthday Card

Image
 Good day!  I love to paper craft, whether I start with a sketch, fold or colour choice.  It can be so much fun and very rewarding.  I could get caught up with creating and spend a lot of time at my craft table. Today's card is a fun fold that I have made from time to time, especially when I find some DSP that I really like and want to showcase.  That kind of happened here.  The Sun Prints DSP paired with the Night of Navy cardstock is just so regal!  Once you get the cardbase down, the rest is really easy.  A little bit of stamping and adhering and then it's all done! Night of Navy cardbase with the Sun Prints DSP adhered to each of the scored panels as well as  the Basic White insert.  The sentiment is from the Peaceful Moments Stamp set and I used Mememto Ink on Basic White and punched using the Double Oval Punch.  A couple of fussy cut foilage images were added to the sentiment, also from Night of Navy Cardstock and adhered to t...

Stampin' Up! Happy Forest Friends DSP Birthday Card

Image
Another sketch, another afternoon edition of stamping with Andrea and I!  You just never know what kind of shananigans we might get into.  It's always a blast! I started with the Calypso Coral cardbase where I adhered the layer of dsp using Stampin' Seal.  Then I stamped a few flower using Blushing Bride and Calypso Coral inks onto Blushing Bride cardstock.  Then I fussy cut them out.  Using the Best Label Punch, the sentiment was cut from Blushing Bride cardstock stamped in Calypso Coral and popped up using Stampin' Dimensionals.  The flowers were put together using Stampin' Seal and Mini Glue Dots and adhered to the card front.  A  bow from the Simply Elegant Trim and a few Irridescent Rhinestones Basic Jewels finished off the card nicely. Measurements and materials: Calypso Coral cardbase 5 1/2 x 8 1/2; scraps for flowers Blushing Bride cardstock, scraps for flowers Basic White 4 x 5 1/4 Happy Forest Friends DSP 4 x 5 1/4 Best Label Punch Hello...

Stampin' Up! Country Floral Lane DSP Friend card

Image
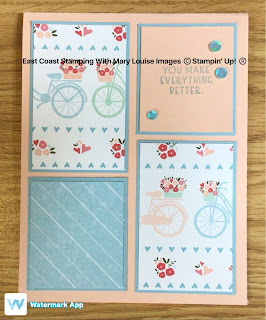
My Sketchintuesday cards are usually based on a sketch that I have seen somewhere and this one proved to be so easy yet pretty.  I think alot depends on colours and patterns of your cardstock you use.  Stampin' Up! makes that easy, no matching needed. My focus today was to use soon to be retired (and possibly already sold out) Country Floral Lane Dsp, one that I first purchased when the mini went live but have not used nearly enough.  With just a couple or more rectangles of dsp and cardstock and a kind sentiment, it equals a really nice card just waiting to be sent. I stamped the sentiment from Nothing's Better Than onto a piece of Petal Pink cardstock using Balmy Blue ink.  Then I started building my layers and applied them to the Petal Pink cardbase.  Of course I stamped on the inside too and added a small strip of coordinating dsp.  A few Pastel Adhesive Backed sequins added the finishing touches.   I have made cards using similar layouts but ...

Stampin' Up! Flowers of Friendship Thank You card

Image
 Today's card is created using items that will be retiring very soon.  Both the Rich Razzleberry products and the Flowers Of Friendship stamp set will be gone very soon.  I have used the flowers stamp set a fair amount but will admit, the Rich Razzleberry doesn't get used a lot.  Of course, the sketch is from Andrea and you can watch our live on facebook.   I had an oval mask in my stash that I used as a template.  Using my Blending Brush and the Balmy Blue and Blushing Bride ink pads, I created a background that might pass as a sunset or at least a pretty backdrop for the flowers.  Before I removed the template, I stamped the flowers in Memento ink, then removed the template and coloured in the flowers using my Stampin' Blends.  I added a sentiment using Rich Razzleberry ink.  This is adhered to the Rich Razzleberry layer and then popped up onto the Basic White cardbase.  A few Rhinestones which I coloured using the Blackberry Bli...

Stampin' Up! Heron Habitat Sympathy Card

Image
This card is using all my colouring mediums, blending, stamping and colouring too! It is pinterest inspired and I shared it with my club gals.  It was so much fun, and even though we all used the same materials, everyone kind of did their own thing. I stamped the Heron onto a Basic White scrap using Memento, coloured with the blends and fussy cut out.  On the smaller piece of Very Vanilla, I first used Daffodil Delight to create a sun affect in the upper right hand corner.  To give a rugged, worn look, I took my scissors and scuffed up the edges all around.  Then I used some Night of Navy to add some colour to the remainder of the piece.  Using the plants and water stamps, I applied markers to each of the elements to create the cat tails and grasses for both the inside and out of the card.  Last for stamping, was the sentiment in Memento ink.  This was all adhered to the Night of Navy panel and then applied to the Very Vanilla cardbase.  One Drago...

Stampin’ Up! Amazing Thanks Card

Image
  Good Day!  It's almost the end of the month which means the current catalogues will soon be retiring and many of their contents too.  Today's project showcases a few of those items being retired.  It is always sad to see your favourites go but so exciting to see new, potential go-to's.  The Amazing Thanks dies and the Hues of Happiness will no longer be available.  I will surely miss them! I started with a Daffodil Delight cardbase which I adhered a layer of Hues of Happiness DSP to using Stampin' Seal.  Then I adhered another, smaller coordinating piece of DSP.  I fussy cut a couple of flowers and leaves for both the front and inside of the card.  They are all adhered using Stampin' Seal.  Using Adhesive Sheets with the Night of Navy cardstock, I die cut the thanks from the Amazing Thanks Dies and adhered that to the Daffodil Delight Thanks.  Then, using the Black Mini Dimensionals, I popped them up on the front of the card windi...