Posts

Showing posts from July, 2021

Christmas in July Word Wishes on Vellum

Image
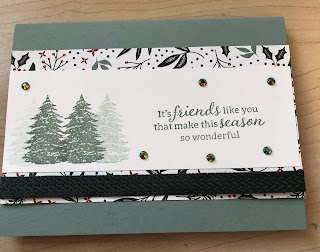
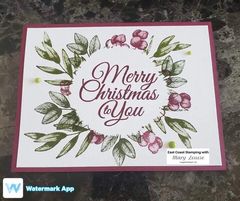
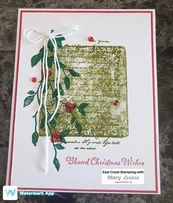
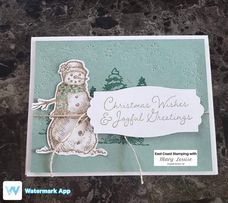
  Are you getting tired of seeing Christmas cards yet?  I certainly hope not because here comes another one.  Again, I featured this at our Christmas in July class recently.  It gave me the chance to showcase a new product which blended well with basic tools from the Annual Catalogue-win win for me.  I did find that I needed a sharp tool such as the take your pick tool to peel off the letters from the adhesive without tearing them.  A little patience will go along way for that one part, otherwise a very simple card.  Let's take a peak! Supply List: Cardstock:Basic Black 121045 cut at 5 1/2"x8 1/2" scored at 4 1/4";   Basic White 159276-cut at 4x5 1/4" Merry Merlot 146979-cut at 3 3/4”x5” Vellum 101856 3 ½” square Ink: Memento 132708 Stamp Sets: Any Christmas sentiment set Dies: Word Wishes 149629: Layering Circle 151770 Embossing Folder: Merry Melody 156392**not orderable until August 3rd/21** Stampin Seal 152813 Black Stampin Dimensionals Comb

East Coast Stampers Team Challenge #casethecatty

Image
 My team and I recently participated in a #casethecatty challenge.  We were given the dimensions for the card pieces and instructed to use the sketch to recreate a project featured in our Annual Catalogue.  I love how we all had different interpretations of the challenge, the cards are fabulous! Do you know which page our sample is found? I can give you a hint, it’s in with the Christmas cards.  Here are our projects.  This one is Jennifer’s, I love the colours she used and especially love her trees image.  I don’t have that stamp set and think I may need to put that in my next order.   Marnie decided to make two cards using different elements while producing equally, beautiful cards. Which do you like best?  I didn’t get the inside memo to make Christmas with the other gals, instead I went wild with this jungle kitty.   I can’t wait for our next craft and chat, stay tuned for what we create next.  #teamwork #teambuilding #eastcoaststampers 

Christmas in July-Banner Year CASE'D

Image
 Yet another sunny day here, certainly hard to focus on Christmas cards but that's okay.  Here is card #4 from our recent Christmas in July held recently.  This card is totally case'd from Pinterest which I think is the best form of flattery ever.   Extremely simple card which can be altered for any occasion, and pieces could be swapped out for dsp or other types of cardstock.   Supply List: Cardstock: Garden Green 102584 -cut at 5 ½”x 8 ½” scored at 4 ¼” Basic White 159276 -cut 1@ 4 ¼” x 5 1/2” ;3 @ ¾”x5”; 1@3/4”x3 ¾” Cherry Cobbler 119685 - 2@3/4”x5”; 1@1”x4 ¼” Ink: Cherry Cobbler 147083 ; Garden Green 147089 Stamp Sets: Banner Year 158239 Punch: Banners Pick A Punch153608 Embossing Folder: Bark 3D 155431 Tear & Tape 154031 ; Dimensionals 104430 Paper Trimmer 152392 Stampin Cut & Emboss Machine- 149653 Step- By- Step Instructions:   Stamping: Using the Holly and Berries stamps from the Banner Year stamp set, stamp them in Garden Green and Cherry Co

Christmas in July Masking with Forever Fern

Image
 Another warm and muggy day today here in the Annapolis Valley and we have an air quality watch as well.  The smoke from all of the forest fires that are active right now in the other provinces is drifting east.  I can't imagine how bad it is closer to the actual fires.  Hope everyone is safe and some much needed rain comes your way to help battle the flames. Today's post is the third of six of my offerings for the Christmas in July stamp a stack from last weekend. This is the masking technique,  I got the original idea from another demo.  Her card had the negative space across the center of the card from side to side, but I changed mine up to allow the use of this huge sentiment stamp from the Holly Jolly Wishes set (available August 3rd). This was a bit messy to create but I think it's totally worth it. Supply List: Cardstock: Merry Merlot 146979 -cut at 5 ½”x 8 ½” scored at 4 ¼” Basic White 159276 -2 cut at 4” x 5 1/4” Scrap of paper approx. 2 ½” Ink: Mossy Meado

Christmas in July Stamp a Stack-Very Versailles

Image
 It's hard to think about making Christmas cards right now, the sun is shining and the birds are chirping but here we are.  :) This is the second of my offerings for our Stamp a Stack and I will confess, it is totally CASE'D from Pinterest.  When we were making plans for the event, I started to panic as I didn't have much for Christmas supplies so I knew I would have to be creative.  I like how this one turned out and so did all the participants.   Supply List: Cardstock: Basic White 159276 -cut at 5 ½”x 8 ½” scored at 4 ¼”; 4”x5 ¼” Real Red 102482 -cut at 4 ¼” x 5 ½” Ink: Real Red 147084 , Shaded Spruce 147088 , Pear Pizzaz 147104 Stamp Sets: Very Versailles 149275 ; Banner Year 158239 ; Itty Bitty Christmas (retired) Embellishments: Bakers Twine Essentials Pack (white) 155475 ; Wonderful Gems153536 Tear & Tape 154031 ; Mini Glue Dots 103683 Paper Trimmer 152392 Block E 118484 Step by Step Instructions: Stamping: Ink block E up with Pear Pizzazz, stamp off once onto

Christmas in July Snow Wonder-Case the Catty

Image
 I was very excited to learn that the Snow Wonder stamp set and  Snow Time dies were carried over from last years' Holiday mini as it was my only Christmas set I had that was current plus it's totally cute.  I decided to case the catty, but did change up the colours a bit.   Everyone at our Christmas in July Stamp a Stack seemed to enjoy the mix of Crumb Cake and Soft Succulent which aren't traditionally Christmas colours.  When you receive your copy of the Mini catalogue, this cutie pie is found on page 21.  Supply List: Cardstock: Basic White 159276 -cut at 5 ½”x 8 ½” scored at 4 ¼”; scrap for sentiment die cut; scrap for snowman die cut Soft Succulent 155776 -cut at 4”x5 ¼” Ink: Crumb Cake 147117 ; Shaded Spruce 146981 Stamp Sets: Snow Wonder 153344 Dies: Snow Time Dies 153564 Markers: Crumb Cake 154962 and Shaded Spruce 154906 Accessories: Baker’s Twine Essentials Pack 155475 Tear & Tape Adhesive 154031 ; Dimensionals 104430 Tools: Stampin' Cut

Christmas Stamp a Stack

Image
 Christmas in July Stamp a Stack with my upline was a huge success.  For the first time in many months, we were able to offer in person events again and boy what a treat!  We spent the day with 11 crafty ladies where we offered up fun, laughter, ideas, friendships and of course, lot of great Christmas cards.  When we started prepping for this class, neither of us had received our preorder from the  Mini Catalogue yet  so our offerings were based mostly from the Annual Catalogue.  We did feature a few table favours using the Penguin Place bundle just to tease the ladies and what a hit!  I only managed to get a couple of pics but I will be sharing the details of my cards over the next several days.  Thanks to all the gals for a great day and to my upline, Tara, for co hosting another great event. 

In The Wild with Inspire.Create.Challenge #95 Sketch Challenge

Image
 Good evening folks, and what a good evening it is.  We started out cool and comfortable this morning, so I rushed around and got my housework done so I could relax later on.  Looking forward to a nice evening walk shortly once some of the heat from the sun has died off. I stumbled upon this challenge a few days ago and thought I would give it a try as it was a sketch challenge and you know me and sketches.  It is from Inspire.Create.Challenges and I can't wait to participate in future challenges.  You can see what others have done with the sketch here, on their blog: http://inspirecreatechallenges.blogspot.com/ I focused on items from the Annual Catalogue, using the new In Colour-Evening Evergreen and some super fun designer series paper-In The Wild. I had a lot of fun creating this card, even fussy cutting the fierce cat for the front.   Supply List: Cardstock: Evening Evergreen 155574-cut at 4 ¼”x 8 ½” scored at 4 ¼”; scrap for tag punch Basic White 159276-cut at 4" x 5

Technique Card – Basic Borders Rainbow By Andrea Mair Estensen

Image
 Welcome, We just had the most amazing thunder and lightening storm with heavy rains that I can remember.  It started around 3pm yesterday afternoon and finished around 8am this morning.  So much rain, sadly several homes and businesses in the area were struck by the lightening, but now the air is a bit cooler.   My blog post today was actually created by my side line-Andrea.  I love that we share ideas as we have completely different styles of card making.   Thanks for stopping by Supply List:   Stamps :   Forever Fern   Papers : Balmy Blue 4 x 5 ½   Strips of Real Red, Mango Melody, Daffodil Delight, Granny Apple Green, Pacific Point, Night of Navy, Highland Heather   Inks :     Balmy Blue     Embellishments :   Epoxy Essentials clear raindrops   Tools :   Basic Border dies (curve and clouds)              Embossing Machine   Adhesives :    dimensional, Stampin Seal or glue dots Step- By- Step Instructions: 1.        Start by cutting the curves out of the

#sketchintuesday 07/21/21 Penguin Place

Image
 Good afternoon, today we are having a very overcast day.  Rain and possible thunderstorms are forecasted and I really hope we get both!  It has been so very hot and humid lately, it's been very difficult to stay cool and craft. Today I am featuring a card I made last night during a facebook live.  Each Tuesday I go live and create a card using a sketch that a fellow Stampin Up demonstrator (Barb Stortz) finds online and sends to me.   This week, I featured the Penguin Place bundle and free SAB dsp Penguin Playmates. Isn't he just the cutest???   If you want to see the live, pop over to East Coast Stampin with Mary Louise and take a look.  https://www.facebook.com/eastcoaststampingwithMaryLouise   Supply List: Cardstock: Basic Black-cut at 5 ½”x 8 ½” scored at 4 ¼”; scrap for banner and penguin body Basic White-cut at 4 x 5 1/4”; scrap for penguin belly Penguin Playmates dsp-3” x 4 ½”; 2”x3 ½”; 2 trees to fussy cut Ink: Memento, Calypso Coral Stamp Sets: Penguin Place

Pet Sympathy Card

Image
 #throwbackthursday creation, I'm just a day late posting...eek!  A friend of mine lost her beloved cat yesterday so I thought I would send her a sympathy card.  It's always hard when you lose a fur baby.  I dug out some retired items to create this project after a quick search on Pinterest for an interesting layout.  The dsp, dies and bling are all from past catalogues but I teamed them up with the Pampered Pets stamp set and Banner Pick a Punch.  It was a sad occasion to have to create this card for her, but it's been made with lots of Love.  I hope she likes it as much as I do. Supply List: Cardstock: Basic Black-cut at 5 ½”x 8 ½” scored at 4 ¼”; scrap for circle layer and sentiment layer (1”x3”) Real Red- scrap for circle layer Basic White- cut at 4”x5 ¼”; scraps for sentiment (3/4”x2 7/8”) and circle layer Playful Pets DSP-4”x5 ¼”; 1/2”x5 1/4” Ink: Memento; Real Red Stampin Blends: Crumb Cake light and dark Stampin Write Marker: Petal Pink Stamp Set: Pa

#HSSSC368 sketch challenge

Image
I thought I would try my hand at another sketch challenge, this time with Hand Stamped Sentiments blog. You can check out my submission along with the sketch and what other demos and crafters are creating.  #HSSSC368  http://handstampedsentiments.blogspot.com/ . I used the Pampered Pets bundle and fabulous Simply Elegant dsp to make this simple but bold card.  
Image
 I recently held a virtual event where we all created a simple, Christmas in July card.  I had originally found this design on Pinterest, and just changed up the designer series paper and embellishments.  This is such a simple but practical card that can be mass produced for Christmas or any occasion really.   Supply List: Cardstock: Cherry Cobbler 119685 cut at 5 ½”x 8 ½” scored at 4 ¼”; scrap for sentiment Basic White 159276 cut at 4” x 5 ¼”, scrap for punch Tidingsof Christmas dsp 155718 cut at 3 ¾” x 5” Punch: Everyday Label 144668 Ink: Memento 132708 Stamp Sets: Banner Year 158239 Accessories: Silver & Epoxy Essentials 155567 , Simply Elegant Trim 155766 4” Adhesive 152813 , dimensionals 104430 Paper Trimmer 152392 Step- By- Step Instructions:   Stamping: Using the scrap of basic white, stamp Be Merry from the Banner Year stamp set with Memento ink and punch out using the Everyday Label punch.   If you would like to add a sentiment for the insert,

Simply Elegant Designer Series Paper Mystery Challenge Pieces

Image
 My teammates and I participate in a team swap and this month my offerings were die cuts of Simply Elegant designer series paper and Gold Foil using the Basic Borders dies.  I absolutely love this dsp, both sides in fact which is going to make it difficult to choose one over the other.  The dsp paired with Very Vanilla makes such an elegant card, I just couldn't wait to get started. Supply List: Cardstock: Basic Gray 121044 cut @ 4 ¼” x 8 ½” scored at 5 ½”;   scrap to punch   Very Vanilla 101650 2 @ 4” x 5 ½; scrap for sentiment DSP: Simply Elegant 155761 Gold Foil: 132622 Stamp Sets: Very Versailles 149275 ; Many Messages 154510 Dies: Basic Borders 1555558 Messages 154422 ,   Double Oval Punch 154242 Ink pad: Memento 132708 Adhesive, 152813 mini dimensionals 144108 Silver & Clear Epoxy Essentials 155567 Stampin Cut & Emboss Machine 149653 Paper Trimmer 152392 Step- By- Step Instructions:   Stamping: Using the Memento ink, stamp the large ve

Andrea's Mystery Challenge Pieces

Image
When I first received my mystery pieces from Andrea, I had no idea what I was going to do with them and set them aside.  Last night for my #sketchintuesday project, I had the most adaptable sketch and when I looked again at Andrea's pieces I knew exactly what I was going to do.  This layout uses small pieces of dsp or you could use plain cardstock and emboss, the possibilities are endless.  I really enjoyed putting this card together, I hope you do too.  I've included the original sketch for your reference.  Supply List: Cardstock: Basic White-cut at 5 ½”x 8 ½” scored at 4 ¼”; scrap for sentiment Calypso Coral-cut at 4 ¼” x 5 3/8” ; scrap for flowers Pear Pizzaz-scraps for flowers You’re a Peach dsp-3 pieces cut at 2” x3” Ink: Memento, Calypso Coral, Pear Pizzaz Stamp Sets: Many Messages and dies, Flowers of Friendship bundle Adhesive, mini dimensionals Paper Trimmer Step- By- Step Instructions:   Stamping: Using the scrap of basic white, stamp and die cut your

Stampin Blends on Vellum

Image
 What a glorious weekend!  It was rainy and cool following a terribly hot week and I loved it all.  Even though I had to work all weekend, I was able to enjoy special visits and hugs from my family.  Our  grandson came for a sleepover on Saturday night with us, he still asks for nanny snuggles when I put him to bed.  We also had supper guests Saturday night, double special.  Our oldest daughter, Emma and her significant other, Cody, joined us from New Brunswick.  The borders opened Wednesday and they came home for a visit to see family and friends.  We haven't seen each other in person since September so it was long overdue.  Needless to say, I didn't get into my craft room much.   Today's card was made by my good friend and fellow team member, Andrea.  She loves to experiment and get her hands messy.  I love her technique used here for this card.  Once we can get back to in person classes, I plan to do this with my club girls.  I hope you try this out. Supply List: Basic

Plentiful Plants Sketch

Image
This is just how easy it is to take a random sketch or one you've created and apply it with your stamping products you have on hand.  I am on a team with other Canadian Stampin Up demos who create various sketches, techniques or folds to share amongst ourselves.  While this isn't my own design, I am happy to share some inspiration on how to use some of our great Stampin Up products.