Posts

Showing posts from July, 2022

Stampin Up He's the Man Simple Sketch Birthday Card
Image
Today's post is based on a sketch that I found on pinterest that I really like and have used several times.  It is a simple sketch and can actually help you to utilize your little pieces found in your craft stash.  I especially like today's card as I was able to use several sheets of dsp from the "He's the Man" dsp pack and didn't need to stamp an image or sentiment.  It is a simple, layering card so perfect for crafters of all experience levels.   I used Cajun Craze as my cardbase and a couple of pieces of Sahara Sand - for the front layer as well as the insert.  After I arranged the pieces that I had cut and adhered to the Sahara Sand layer and then adhered to the card base, I popped up my focal images using dimensionals.  I 1 little length of twine from the Baker's Twine Essentials Pack adds just a bit of interest to the sentiment.  I just love how it all came together, all because of how Stampin Up coordinates their products to work so well together. I
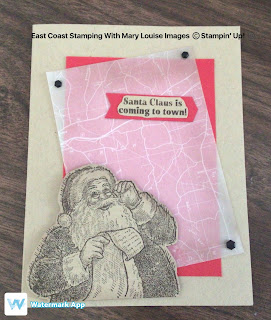
Stampin Up Santa’s List with Vellum

Image
The focus of todays project was Santa’s list as it was for a Christmas in July card swap.  I have had this stamp set for many years, I think it was only in the catalogue for one season but he is my favourite Santa.  This card was pretty easy to create and would be a great mass production layout for any occasion.  I stamped and then fussy cut Santa using Crumb Cake cardstock.    Stamp set: Santa’s List, Santa’s Delivery Cardstock: Crumb Cake cardbase, Real Red layer Vellum Layering Designs Early Espresso ink pad Blending Brush, Banners Pick a Punch Stampin Seal, Mini Glue Dots  Classic Matte Dots Thanks for stopping by, Mary Louise Want to see more?  https://bit.ly/MaryLouiseSocial

Stampin Up Trees for Sale

Image
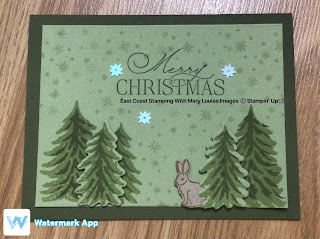
 Todays project was created for my recent mini catalogue launch party.  I used the Trees for sale stamp set, stamped with Mossy Meadow and Old Olive onto an Old Olive layer.  I stamped a few on scraps and fussy cut them out for extra dimension.  Using the snowflake stamp from the Peaceful Deer stamp,  I stamped using Versamark  to create the background of snowfall.  The cute bunny was stamped using Soft Suede onto a piece of Crumb Cake cardstock, fussy cut and tucked behind one of the trees.  The sentiment is from the Brightest Glow stamp set using Mossy Meadow.  Some adhesive backed stars were added to finish the card off.  I just love how this card came together so easily for a great card!  Thanks for stopping by, Mary Louise

Stampin Up Painted Christmas DSP Strips Card

Image
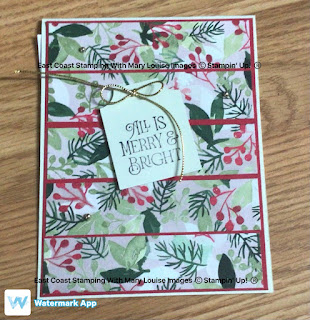
Hey!  Can you imagine this heat???  As I am writing this post, we are smack dab in the middle of a week of high 20's and into 30's with humidex.  My work in my craft room is being done early so I can retire for the rest of the day in front of an air conditioner or fan elsewhere. This project was created to use for my launch party for the July-December mini catalogue earlier this month.  The featured products being the returning dsp Painted Christmas, new stamp set-Brightest Glow and the popular Festive Pearls embellishments. Simple cuts, stamping and layering for this card makes it an easy one to mass produce and perfect for any occasion by simply swapping out the dsp and sentiment.  Let's take a look! Cardbase (Soft Sea Foam)-4 1/4 x 8 1/2, scrap for punched sentiment; Layer (Real Red)-4 1/8 x 5 5/8; Insert (Basic White) 4 x 5 1/4 DSP (Painted Christmas)-4 x 5 1/4 then cut into 1 x 5" strips; strip 1/2 x 4 for insert Essential Tag Punch Brightest Glow Stamp Set Simply

Stampin Up Perfectly Pencilled Sketch Challenge

Image
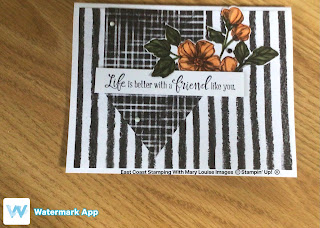
 Good day my crafty peoples.  Todays project was created for a sketch challenge during one of my weekly Facebook lives where my fellow stamper provides me with a sketch and I recreate it.    It’s so much fun to see how we everyone interprets a sketch.   For this project, I used the Perfectly Pencilled dsp from the 2022-2023 annual catalogue for most of the card.  Coordinating designs of the dsp make cards so easy to prepare, I also fussy cut a flower image to colour with Stampin Blends too.  The card was super easy and fast to put together once the colouring was finished.   The card front is 4 x 5 1/4 and is adhered to a Basic White cardbase using Stampin seal.  The banner is 2 3/4 x 3 3/4 and then I made a simple point to it using my scissors.  Next I coloured my fussy cut image using Mossy a meadows and Pumpkin a pie blends and adhered that to the front pieces using Stampin Seal.  A small strip of Basic White scrap stamped with a sentiment from Peaceful Moments using Memento is poppe

Fussy Cutting Stampin Up Perfectly Pencilled dsp

Image
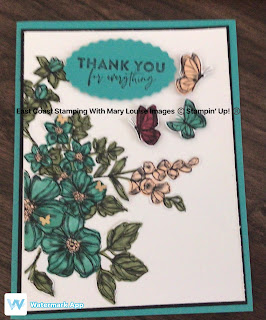
 Good day, and welcome to East Coast Stamping with Mary Louise from Nova Scotia, Canada.  Todays project was created using a sketch that my side line Andrea created.  We did a live via Facebook where we each created using the same sketch.  Oh boy, do we ever have different interpretations and crafting styles but isn’t that what makes crafting fun?  Here is what I made and the sketch:  I fussy cut out the flowers and butterflies from the Perfectly Penciled DSP and coloured using Stampin blends.  Then I adhered onto a layer of Basic White cardstock and then onto a piece of Basic Black.  This all went on to a Bermuda Bay cardbase.  The sentiment is from Flowers of Friendship which was stamped using Memento onto a scrap of Bermuda Bay and punched from the Double Oval Punch.  That was popped up using dimensionals and then added a few of the Brushed Brass Butterflies.  I love how it all came together, don’t you?  Here are the measurements.  Thanks for dropping by,  Mary Louise Want to see mo

Stampin Up Scrappy Strips of DSP

Image
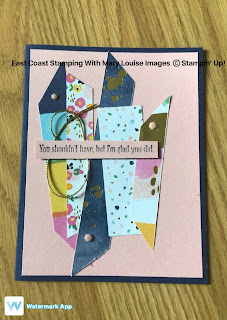
 Hey, my crafting friends, Welcome to another card post from East Coast Stamping with Mary Louise.  Todays project came to me as I was looking at my many piles and storage cases of dsp scraps.  You know, those bits that are left over when you make your cards, they are too big to toss and way too pretty too.  So it's a bit of inspiration to grab those little piles and put some adhesive on them and create some beautiful samples to use or sell.  There really isn't right or wrong or actual dimensions for the strips either.   I cut up some pieces of dsp, adhered them all to the layer which then was glued to the cardbase.  Arrange them anywhich way you want, the sky is the limit.  I stamped the sentiment onto a small piece of cardstock, trimmed it down and popped it up onto the front after arranging a small piece of the gold trim.  Pop on a few embellishment and your card is finished! Don't forget to add your insert and add a little bit if dsp to that as well.   Materials: Cardba

Stampin Up Flowers Of Friendship Birthday Card Sketch Fun

Image
 Hello fellow paper crafters, Today's project was created during a facebook live with my side line, Andrea  where we made a card using the same sketch that she had designed .  We had so much fun, we have totally different crafting ways but we both ended up with beautiful cards.  I believe this might be a weekly thing, make sure you check back often to see. My cardbase was Night of Navy, standard A2 size.   Then I added a piece of Awash in Beauty dsp 3 x 4 1/4.  Two pieces of Basic White, 3 x 4 1/4 are needed, one for insert, the second for the front to stamp on.  Flowers of Friendships and Charming Sentiments were the stamp sets used.  Night of Navy and Memento ink pads Stampin Blends are Night of Navy and Old Olive light and dark Rhinestones basic jewels, stampin seal, stampin dimensionals and blending brush First I stamped the flower image on the basic white piece using Memento, then outlined using the dark versions of both Night of Navy and Old Olive followed by colouring with

Stampin Up Slimline Kindest Gnomes

Image
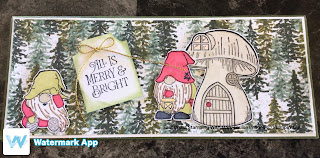
 Hello stampers,  Todays project was created for my Holiday Mini and SAB catalogues launch party recently.  I wanted to showcase products from both catalogues and think it turned out quite cute.  These gnomes deserved a really big card so I went with a slimline so I could give them lots of room to be adorable.  Of course they are coloured using Stampin Blends and some simple layering once the initial stamping and die cutting was complete.   Stamp images using Memento onto scraps of Basic White cardstock and cut out using dies or fussy cut.  Colour each image with blends.  Stamp sentiment onto Basic White cardstock using Memento and punch out with Tag punch.  Using the blending brush, add a bit of Mossy Meadow for some added texture around the edges.  Tie a small bow from the gold string in the Simply Elegant Trim pack and secure with a glue dot.  Now you can start putting the card together, it’s simply layering dsp onto Basic White and then onto the cardbase.  The second piece of Basic

Stampin Up Flowers of Friendship Thank You card.

Image
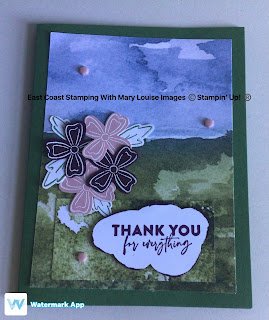
 I recently hosted a craft and chat where we cased a card from the annual catty.  A few friends dropped in virtually and a great time was had.  Using the sketch and the measurements provided in our Canadian Stampin Up newsletter, we each set out to create our interpretation of the sketch.   For my project, I chose the now retired New Horizons designer series paper layered onto a cardbase of Garden Green.  Flowers from the Flowers of Friendship stamp set were stamped using Versamark and embossed with White embossing powder onto Blackberry Bliss and Blushing Bride cardstock.  Leaves were stamped using Garden Green onto Basic White and then all were punched using the Flowers and Leaves punch. These were all added to the dsp using Stampin Seal and Mini Glue Dots.  The sentiment was stamped using Blackberry Bliss onto Basic White and punched using the Cloud punch and edged with Blackberry Bliss ink and popped up onto the second piece of dsp using dimensionals.  A few of the adhesive backed

Stampin Up kindest gnome good luck card.

Image
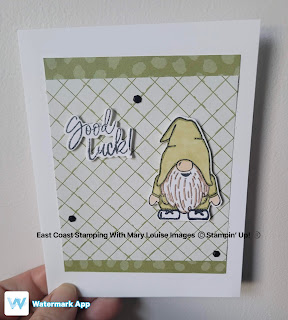
 Are you ready for a cutie from the new Holiday Mini?  Tonight I crafted using the Kindest Gnomes bundle and some of the Design a Daydream dsp from the annual catalogue.  What?  You didn’t see that either?  It is a hostess perk and I have flipped by it several times.  And starting today, you can order the Kindest Gnomes bundle from the Holiday Mini.   So todays card is another sketch challenge from my fellow stamper, Barb.  I found this one easier to do which was great because I had little company for the afternoon and was getting short on prep time.  Pre stamping and cutting can be so beneficial as I just pulled both my image and sentiment from my stash and added to my card.  I coloured the gnome using my Stampin’ Blends-light and dark Old Olive for the hat and clothes, Basic Black for his boots and mouth, Ivory for nose and hands and Bronze for beard highlights. These are both popped up on dimensionals on the dsp layers.  As you can see, the two smaller strips of dsp are adhered to t