Posts

Showing posts from August, 2022

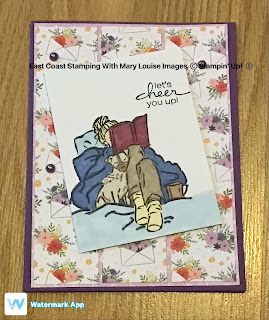
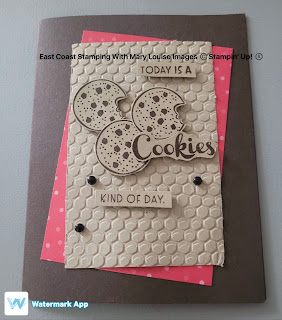
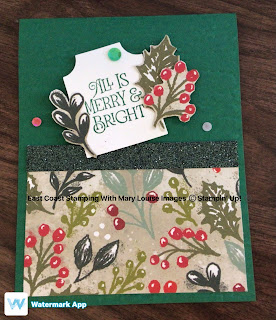
Stampin UP Boughs of Holly Christmas Card

Image
Here is another sample of a quick and easy starter to your stamp camp or great for beginner/intermediate group of crafters.  We embossed the card front using the Bark embossing folder, then adhered the dsp to the front and finally the strip of glimmer paper.  Then we fussy cut some of the leaves and berries from the Boughs of Holly dsp and added them to the sentiment label which is a piece of Basic White cardstock stamped with Shaded Spruce and punched out using Essentials Tag Punch.  This was popped up using dimensionals.  I added a few embellishments to finish it off.  Another great card using beautiful dsp.    List of materials and measurements: Cardbase: Shaded Spruce Cardstock, 4 1/4 x 11 Basic White, 4 x 5 1/4; scrap for tag Glimmer paper, strip 1/4 x 4 Boughs of Holly DSP, 4 x 2 3/4; scraps for fussy cutting Bark 3D Embossing Folder Brightest Glow Stamp Set Essentials Tag Punch Shaded Spruce Ink Pad Adhesive-Backed Seasonal Sequins Stampin Seal, Stampin Dimensionals Thanks for s

Stampin Up Leaves of Holly Christmas Card

Image
Today's project features cards made yesterday for a Christmas in July stamp camp,  which got postponed a few times.  BUT, we finally did it and everyone had a blast. This card features the Merry Melody Embossing Folder as well as the Leaves of Holly Bundle. Here's how we did it: The Basic White layer was run through the embossing machine using the Merry Melody embossing folder, then adhered to the black layer and finally glued to the cardbase.  Next, I heat embossed the sentiment using Gold embossing powder onto a strip of Basic White which was then adhered to a strip of Basic Black.  This is popped up on dimensionals to allow clearance for the leaves and trim.  The leaves were die cut from Mossy Meadow cardstock.  I have two options for the red accent-one being punched from Real Red using the retired sprig punch or using the textural elements which I coloured using Real Red and Mossy Meadows blends.  A piece of Gold Essential Trim was wound around twice and added with the leav

Sweet Sunflowers August 2022 Paper Pumpkin Alternative

Image
 For today's sketch challenge, I did something a bit different, well a couple.  First, I almost completely followed the sketch which isn't normal, but the second was that I pulled in supplies from a paper pumpkin kit.  In fact, all but the embellishments, card base and another layer, everything was paper pumpkin.  More specifically, the Sweet Sunflowers from August 2022. When I first looked at the sketch that my friend Barb  from Making Cards at 1 Ink Hill sent me, I knew it had to be a sunflower in place of the circle-the main focal point of the card front.  My problem then was, I don't have many flower stamps and not a chance of a sunflower.  Then I remembered seeing so many beautiful cards on social media lately using the latest paper pumpkin and it has a sunflower stamp.  So I opened up my kit, and dug through to the stamp set and there was my sunflower.  Then I cut one of the card bases in half to use as my front layer and a couple of the die cuts too.  The flap of the

Stampin Up Emboss Resist with Wonderful World

Image
 It’s almost the end of the month which means end of Sale A Bration, eeek.  How did that happen?  Todays project uses the Wonderful World stamp set, it is bundled with beautiful designer series paper and offered as a step 2 free item.  Step 2 just means it is free with a $120 order before shipping and taxes.  If this is something you must have, see me soon.   This technique has been around forever and I had forgotten about it.  So glad I decided to bring out my heat tool on this hot day and melt some powder.  It is a simple, fun fold with layering other than the embossing part of the card.   Using Versamark, I stamped both my image and sentiment onto a piece of Basic White cardstock after using my embossing buddy to remove any static on your paper.  Then I sprinkled white embossing powder over the stamped images and then blasted with the heat tool until melted.  You can tell if the powder is melted when it changes from the powder to be shiny and smooth.  Next I used my blending brush a

Stampin Up Caroling Mice Christmas Card

Image
 Good day everyone, I enjoyed the sketch I used in my last blog post so much, I decided to use it again.  This time I made a Christmas card using the Hostess stamp set: Caroling Mice.  Yes, I really enjoy colouring and these guys will be fun to explore many colour palettes.  Another fun fact, even though this is a Christmas card, I used a piece of the Sun Prints dsp as the matt layer.   I stamped the Caroling Mice onto a piece of Very Vanilla in Memento ink, then coloured with stampin blends.  Night of Navy was used for the card base and a piece of Sun Prints dsp for the mat layer.  Using Memento ink, I stamped the sentiment from Leaves of Holly, the music notes and the "pebbles?" from the Caroling Mice onto the dsp which I then adhered to the card base using Stampin Seal.  The mice image was fussy cut then popped up on dimensionals and placed onto the card front allowing the music notes and other images to show.  I like a finished insert, so I stamped some music notes, added

Stampin UP Biggest Wish Masculine Birthday Card

Image
 Hello my friends, and welcome to another card sketch post.  Today's card features a sketch from my side line, Andrea from Prairie Sky Paper Crafts by Andrea.  And the fun part of it was, we did a facebook live together to create using the sketch.  How cool! So my take on the sketch was pretty close to the actual for a change, where I used the Biggest Wish stamp set as my main focal image.  I stamped several times using Birthday and Old Olive using my stamparatus then added the birthday in Memento.  Of course this was stamped on a piece of Basic White then popped up using dimensionals.  The card base is Basic Black with a layer of Old Olive and then a layer of the Design a Daydream dsp.  I stamped the little plus signs or whatever you want to call them using Old Olive onto the dsp in the top right and lower left, just enough to be seen from under the birthday image.  I wrapped a piece of black bakers twine from the Bakers Twine Essentials Pack around the popped up image a couple of

Stampin Up In The Moment Get Well Soon card

Image
 Hey everyone,  Mary Louise here, on yet another warm day.  I am sure you are tired of hearing me complain about the heat, lol,  wait till fall and I will be so happy to describe the lovely temperatures and colours all around me.  So in the meantime, it’s another hot, muggy day.  I am off from my other job today and I am moving from room to room under the fans to do what needs to be done in those rooms.   Todays post screams warmth but not necessarily in an outside hot kind of way.  So many of my friends have been unwell lately.  Between Covid, colds and surgeries, I just needed to create something that I could send them to help cheer them up.   I love to read, that paired with puppy love and a cozy blanket-all the right ingredients for an afternoon of self healing.  While it is a colourful card, it’s not bright and an in your face kind of colourful.  I hope it can make someone smile when they receive it.   I used a Gorgeous Grape cardbase, and topped it with a layer of Tea Boutique DS

Stampin Up Nothings Better Than sketching with a friend.

Image
 The weather gods have been listening to me complain lately and are being more kind to me.  The temps are still warm but certainly not sweltering like they had been.  I was able to create without working up a sweat for a change.  Between the heat and my ear infection, I have not been in my room much at all and boy do I miss it.  Today it was extra special as I was doing a live with my friend Andrea Andrea where we used the same sketch to create but also the same stamp set.  Talk about fun!  My cardbase is Early Espresso with a Crumb Cake Matte and insert and a piece of Sweet Sorbet dsp for some colour.  I embossed the crumb cake using the Hive 3 D embossing folder and adhered all three pieces together using Stampin Seal.  I stamped some cookies and sentiments using Early Espresso onto Crumb Cake scraps from the Nothings Better Than stamp set.  I fussy cut my cookies and sentiments out and adhered to the front using mini dimensionals to pop them up.  Finished off with some Classic Matt