Posts

Showing posts from July, 2023

Stampin' Up! Trucking Along Birthday Card

Image
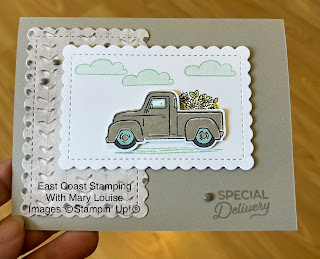
 Today's card features the Trucking Along stamp set and punch.  It's a very versatile stamp that can be used for several different occasions or seasons plus it is a two step stamp.  Two step means that you use one stamp for the detailed outline, then stamp using the "fill in" stamp to do just that, fill in the image.  So in the instance of my project, the truck, clouds and the flowers were all done using the two step stamping technique.  So much fun!  The inspiration for this card came from Pinterest, I just changed up the colours and papers used.   My cardbase is Gray Granite, with a die cut piece of Earthern Elegance dsp and another of Basic White.  There is another piece of Basic White for the insert that I also stamped on.  Here is how I did it: Stamping directly onto the cardbase with the sentiment stamp and Gray Granite.  Then I adhered the die cut piece of dsp to the cardbase.  The die cut of Basic White, stamp the truck outline stamp using Gray Granite.  Then

Stampin' Up! Sweet Songbirds Birthday Card

Image
Hello everyone!  I hope you have been safe from the heat, I have not been as active in my craft room recently because of the heat. The high humidity melts me, and my ability to function during this heat is lacking.  Bring on the fall!  :)  I did participate in part of an event on Friday where there were several sketch challenges to complete.  The one I managed to create was one I had never heard of before but I LOVE how it was done. Instead of saying what colours to use or what shapes go where, the demonstrator took an excisting card and said to do 3 things with that sketch.  The 3 things were all up to you.  For instance, you could change the colours, change the flowers and change the placement of the bling.  These were all using the same sketch now if you didn't want to use the sketch but keep the colour palette you could.  Keep the flowers but change the colours, use the stamp set but change the colour, etc.  You see how versatile it is?  So cool! So I decided to keep the sketch

Stampin' Up! Christmas Cards

Image
Hello everyone and welcome to my blog!  As I craft today, I have several fans going in my room as we are experiencing extreme heat here in Nova Scotia.  I am not a fan of the heat and this humidity is really starting to bug me. Would love to fast forward to September for cooler days and more comfortable weather. While I am melting in my craft room, I am creating Christmas in July cards!  I have been digging up beautiful retired designer series paper and finding all kinds of cool sketches to follow.  As you have seen from my other recent posts, I am really trying to stash some of my dsp stash and this layout is perfect for that.  Most of my paper packs have small bits in them and with the 1" squares of dsp as seen here, I will be able to use those up and not waste anything. I prepped 8 1 " squares of dsp, attached them to a piece of cordinating colour cardstock and embossed together.  Then I tied some ribbon around that layer before I added to the next piece of cardstock.  My

Stampin' Up! Fresh as a Daisy Birthday Card

Image
 Hello and welcome to my blog.  I am an independant Stampin' Up! demonstrator in Nova Scotia and today's card shows heat embossing featuring the Color & Contour stamp set. This technique has been around forever, and so has stamping directly onto the designer series paper.  I just thought it was so much fun and very pretty.  So let's get to it. I used a Basic White cardbase, standard size and topped it with a panel of Fresh as a Daisy DSP.  I picked the Copper Clay piece, it makes the perfect background.  Using the embossing buddy to remove excess static, I rubbed it over the dsp where I was planning to emboss.  This helps to keep your powder where you want it to be.  Then I inked up the flower image in Versamark, randomly placing the flower over the dsp.  After sprinkling with the White Embossing Powder, I set the Heat tool to high and carefully watched as the heat melted the powder.  I could watch that process all day, lol.  This was adhered to the cardbase.  I had a s

Stampin' Up! Color & Contour in Blackberry Bliss Sympathy Card

Image
 Hello everyone and welcome to my blog.   I had a well laid plan for doing this card as a live, and I did but of course my phone had to ring...twice! which blocked my card so I apologize.   When I was looking for inspiration on Pinterest using the Color and Contour stamp set, I found a beautiful card and thought why reinvent the wheel?  I changed up the colours and added different embellishments and made my own beautiful card!  Honestly, I see making this over again with yet another colour palette.   It was beginning to get warm in my room so I was pushing fast to get through it too! My cardbase of Berry Burst held a great foundation for the stack of beauty ontop.  A panel of Blackberry Bliss cardstock and then finally, my Basic White layer which I added colour to.  Using my Blending Brushes and Berry Burst, Blackberry Bliss and Soft Sea Foam ink pads I created my background.  I like to start blending off the cardstock on my scrap paper and gradually sweep onto my project just in case