Posts

Showing posts from October, 2023

Stampin' Up! Abundant Beauty Decorative Masks Masculine Birthday Card

Image
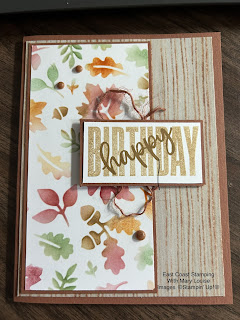
 Hey everyone, todays project was based on a sketch that my pal and side line Andrea created.  It's been so long since we have crafted together, we forgot all the important stuff for our live!  Like, hello, and introducing ourselves and telling what we used to create the projects.  Oh my!  But we had fun and we made beautiful cards so that's all that matters.  It is so much nicer to craft with a buddy, even if it is virtually.  So if you want to catch us live, here is the link.   So my cardbase is Pebble Path, with a layer of Earthern Elegance dsp adhered to it.  Next, using the Abundant Beauty Decorative Masks (leaves mask) and my Blending Brushes, I added various colours and rubbed them onto the Basic White.  This was then layered onto a piece of Pebbled Path cardstock.  While I still had the mask out, I made a small design up the side of the insert also.  Then I stamped a sentiment, added a strip of dsp and adhered to the inside of the card.  My front sentiment is stamped u

Stampin' Up! Abundant Beauty Decorative Mask Christmas Card

Image
 Good day my crafting friends!  What a beautiful fall we are having so far here in Nova Scotia.  A few of the tropical storms have impacted parts of the province, but so far nothing we can't handle. This week's #sketchintuesday I stepped away from fall creations and moved to Christmas.  Using the Abundant Beauty Decorative Masks-snowflake option and a piece of Night of Navy cardstock, I went to work and make a little snowfall with the Whisper White ink pad and my Blending Brush.  Once I got started, I didn't want to stop but we didn't need a complete snow storm, just light flurries. :)  I added some strips of the Beary Christmas DSP to the card front and then adhered all to the Balmy Blue cardbase.  My sentiment, stamped using Night of Navy ink onto a Balmy Blue circle die cut from the Stylish Shapes Dies is popped up using Stampin' Dimensionals.  After thinking the card was a bit dark, I added a length of the White Herringbone Ribbon which is adhered using Stampin&

Stampin' Up! Tricks & Treats Halloween Card

Image
Hey everyone!  Good news!  After a warm, summer break I am now back with my Sketchin' Tuesday Lives each week.  It's still been fairly warm but I needed to get back to my weekly routine again. I will admit, that after I made my card, I did rearrange my pieces again and now I am much happier. I really wanted a fun Halloween card so I grabbed the Tricks & Treats stamp set and Them Bones DSP and set out to create.  Using a Basic Black cardbase, I adhered various strips of Them Bones and Stargazing DSP.  I did make all but one strip into a banner at the end, and then they are all adhered using Stampin' Seal!  The haunted house is stamped using Memento onto a scrap of Basic White and fussy cut.  The Basic White "moon" is from the Stylish Shapes dies.  I added some bats and the sentiment, all from the Trick & Treats stamp set.  To finish it off, I added some Memento using my Blending Brush.  The haunted house is adhered using Stampin' Seal to the moon and th

Stampin' Up! Gift of Giving Christmas Card

Image
Good day!  Today's project is one I cased from Pinterest.  I just got this stamp in my order this week and wanted to do something right away.  After a quick peek online, I found this from another demo and thought "I really need to do this".  Now I did alter it a couple of ways, one layer instead of two of the coloured cardstock.  Also, the original post had four layers of the gifts and mine is two. I coloured using my Watercolor Pencils and then used my Blender Pens to, well, blend the colours.  LOL. So I stamped the image onto a layer of Basic White using Memento and coloured in each of the images.  Then I stamped another image onto a scrap, fussy cut just the gifts, coloured those and then used the Blender Pens again.  These are popped up using Stampin' Dimensionals.  Using the Basic Grey pencil, I added some colour and interest under Santa's boots.  This stamped layer was adhered to a layer of Real Red and then mounted onto a Basic White cardbase. Next, I added

Stampin' Up! Winter Meadow Christmas Card

Image
Good day everyone!  I have been making a lot of fall cards recently, so I thought I would take a break and make a really quick and easy Christmas card using the Winter Meadow DSP from Stampin' Up! mini catalogue. It really is a simple card, all I did was cut the dsp and layer it onto the cardbase.  The sentiment is stamped using Brightest Glow stamp set and die onto a strip of the Winter Meadow DSP.  I used Misty Moonlight for stamping and a bit of blending around the edges.  A small banner of the Boho Blue Textured Ribbon under the popped up sentiment, some Wink of Stella on the trees and a few of the Iridescent Rhinestones Basic Jewels finishes off this beautiful card.  Sometimes it's just so nice to make simple but oh so beautiful cards and the offerings that Stampin' Up! has are amazing.  Measurements and Materials: Cardbase Misty Moonlight 5 1/2 x 8 1/2 Basic White cardstock 4 x 5 1/4 Winter Meadow DSP 4 x 5 1/4; strip for sentiment and for insert Brightest Glow stamp